The prototyping process is where ideas stop being abstract and start becoming testable. Instead of debating what might work, you build something just real enough to get answers. That shift—from assumption to evidence—is what moves products forward.
At millermedia7, the prototyping process is treated as a decision-making tool, not just a design step. By testing early and often, teams reduce risk, validate direction, and avoid expensive mistakes later. That’s how faster learning leads to better products.
In this article, we’ll break down how to move from rough concepts to testable prototypes, how to choose the right level of fidelity, and how to turn feedback into smarter iterations. You’ll see how each stage connects to make ideas clearer and faster.
Define the Problem, Audience, and Success Criteria
Before you sketch a screen or cut any material, write down the problem in one clear sentence. Who faces this problem? What does a good solution look like in real life? Success criteria keep your team focused. If you can’t measure whether a prototype worked, you won’t learn much from it.
The Prototyping Process Fails Without Clear Questions
The prototyping process breaks down when teams don’t define what they’re trying to learn. According to the Harvard Business Review, teams that frame clear hypotheses make faster and more effective decisions during product development.
Without a clear question, feedback becomes vague and hard to act on. Clarity at the start shapes every iteration.
When teams define the problem, audience, and success criteria early, each prototype answers something specific. That’s what turns prototyping into a structured learning system instead of trial and error.
Choose the Question Each Iteration Should Answer
Each round of prototyping should test one core assumption. Trying to validate everything at once leads to mixed feedback and wasted effort.
Ask yourself, “Does this layout help users find what they need?” or “Does this form factor fit comfortably in the hand?” Stick to one question per iteration. It keeps design thinking sharp and feedback actionable.
Focus on Key Features Instead of the Full Product
Prototyping forces you to prioritize. You don’t need to build everything. Just focus on the part that carries the most risk or uncertainty.
Zeroing in on key features early saves time and helps you validate design decisions before they get expensive to change.
Map the Right Fidelity for the Job
Fidelity means how closely your prototype matches the final product. Pick the right level based on your timeline, your audience, and the feedback you need. Low-fidelity and high-fidelity prototypes each have their place.
When Low-Fidelity Prototypes Move Faster
Low-fidelity prototypes are quick to make and easy to toss out. A paper prototype or rough sketch lets you test a concept in hours, not days.
Use low-fidelity prototypes when you’re still figuring out the basic structure. They invite honest feedback because users don’t feel like they’re critiquing something polished. That openness leads to better early-stage insights.
When High-Fidelity Prototypes Earn Better Feedback
High-fidelity prototypes look and behave more like the real thing. An interactive prototype in Figma can simulate real user flows and transitions.
You get more precise feedback at this stage because users react to realistic interactions. This is where you validate design decisions that are costly to change after development starts. High-fidelity prototypes work best for stakeholder reviews and final usability tests.
How Digital and Physical Prototypes Serve Different Goals
Digital prototypes test how something works on a screen. Physical models show how something feels, fits, or functions in the real world.
A functional prototype for hardware needs to perform under real conditions. A digital prototype for an app needs to simulate real user behavior. Match the prototyping method to your medium to keep testing relevant and feedback useful.
Turn Early Ideas Into Something People Can React To
Turning an idea into something testable takes several steps. Start broad with sketches and user flows, then add detail with wireframes and interactive mockups. Each step gives you something people can react to.
Sketches, Wireframes, and User Flows
A sketch is the fastest way to make an idea visible. You don’t need design skills. Just get the concept out of your head and onto paper so others can react.
Wireframes add structure. They show layout, content hierarchy, and navigation without color or polish. Wireframing is crucial because it helps teams agree on structure before investing in visuals.
User flows map the steps a person takes to complete a task. They reveal gaps in logic and help you catch problems before you design a single pixel.
Journey Maps, Diagrams, and Wireframing
Journey maps show the full experience a user has, from first contact to task completion. They’re great for spotting friction points that a single screen wireframe might miss.
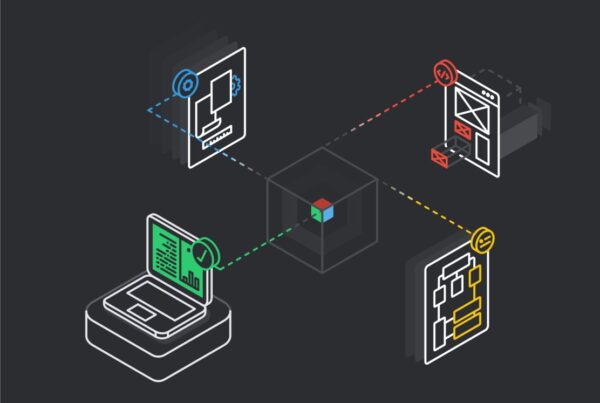
Diagrams help teams align on how data moves or how parts of a product connect. These tools make the invisible logic of a product visible and testable.
From Paper Concepts to Clickable Screens
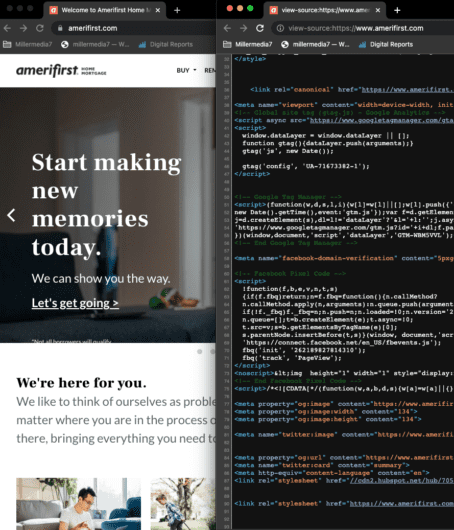
Once your structure is solid, you can turn paper concepts into interactive mockups using tools like Figma, Axure, or Framer. These let you link screens and simulate user interactions.
An interactive mockup isn’t a finished product. It’s a testable version that lets you gather real feedback before writing any code. Moving from paper to clickable screens can speed up the product development cycle.
Choose the Build Method That Matches the Risk
Not every prototype is digital. Physical products, hardware, and manufactured goods need hands-on build methods. Pick a method that fits your timeline and how much risk you want to reduce.
Rapid Prototyping for Speed and Learning
Rapid prototyping covers any method that lets you build and test quickly. The goal is to shrink the time between idea and feedback.
Speed matters most early on. The faster you build and test, the faster you learn. Rapid prototyping methods compress that cycle without sacrificing the quality of your insights.
3D Printing, SLA, and SAF for Additive Builds
3D printing lets you make complex shapes straight from a digital file. SLA creates smooth, detailed parts for visual and fit checks. SAF works better for durable, functional parts.
These additive methods are fast and cheap for one-off parts. Use them to test form factors or check how components fit before committing to production tooling.
CNC Machining, Sheet Metal Fabrication, and Welding
CNC machining cuts parts from solid blocks with high precision. It’s good when surface finish and accuracy matter for your prototype.
Sheet metal fabrication and welding are common for enclosures, frames, and structural parts. These methods give you parts you can test under real load conditions, which matters for validating performance before mass production.
Injection Molding, Urethane Casting, and Production Tooling
Urethane casting makes small batches that closely resemble injection-molded products. It’s a cost-effective way to test designs at low volume before investing in production tooling.
Injection molding is the standard for high-volume manufacturing. Using it for prototyping is pricey, but you get parts with the same finish, material, and tolerances as the final product. This fidelity matters most when you’re close to full-scale production.
Test, Learn, and Tighten the Next Version
Testing is where prototyping pays off. You put what you built in front of real users or real conditions. What you learn shapes the next version and moves the product closer to something that actually works.
User Testing and Usability Testing in Practice
User testing means watching real people interact with your prototype. Observe what they do, where they get stuck, and what they skip. Don’t explain the product. Let them explore and take notes.
Usability testing is more structured. You give users specific tasks and measure how well they finish them. Both methods generate insights that improve user experience in ways assumptions never can.
Functional Testing for Fit, Performance, and Feasibility
Test functional prototypes under conditions that reflect real use. Does the part fit right? Does the feature perform as expected? Can the system handle the load you designed for?
Functional testing shows whether a design is feasible, not just if it looks good. These tests often reveal engineering problems that visual reviews miss.
How Teams Use Feedback Loops to Improve Faster
A feedback loop is simple. Test, collect data, change something, and test again. Each cycle tightens the design and lowers the risk of shipping something broken.
Teams that run short, frequent feedback loops reach better solutions faster. The real value of prototyping comes from iteration, not any single round of testing. The more loops you run, the more confident you get in the final design.
Move From Validation to Handoff and Production
Once you test and validate a prototype, the work shifts from discovery to delivery. This stage needs clear documentation, aligned stakeholders, and a production plan that keeps the design intent intact from concept to final product.
Stakeholder Reviews and Design Sprint Checkpoints
A design sprint packs weeks of work into a short, focused cycle. Stakeholder reviews at the end of each sprint let decision-makers approve direction before the team moves forward. These checkpoints stop expensive late-stage changes.
When stakeholders review a validated prototype instead of a written spec, their feedback is more accurate and useful.
Developer Handoff Without Losing Intent
Developer handoff is where design becomes code. If the handoff goes badly, the final product drifts from what you designed and tested.
Prototyping tools like Figma include handoff features that document spacing, typography, colors, and interactions. A clean handoff protects the validation work you did and reduces back-and-forth between designers and engineers.
Preparing for Manufacturing and Scale
When you’re building a physical product, the last stage is all about getting ready for mass production. You’ll need to lock in your production tooling, double-check your material choices, and make sure the surface finish actually hits the mark.
At this point, you want to verify that your prototype really works at full production volume. Sometimes, injection molding tolerances shift at scale compared to a urethane cast prototype. If you catch those differences early, you’ll save a lot of time and money down the road.
Testing Is What Turns Ideas Into Real Products
The prototyping process is what bridges the gap between an idea and something you can trust. It replaces assumptions with real feedback and turns uncertainty into direction. That’s how teams move forward without wasting time or resources.
At millermedia7, the prototyping process is part of a broader system for building smarter products. By focusing on early validation and continuous iteration, teams reduce risk and build with confidence. That’s what keeps ideas from falling apart during development.
If you’re sitting on an idea or stuck debating what to build next, start testing. Build something small, learn from it, and improve. That’s how the prototyping process turns ideas into products that actually work.
Frequently Asked Questions
What is the prototyping process?
The prototyping process is a method of creating testable versions of a product to validate ideas. It allows teams to gather feedback before full development. This reduces risk and improves final outcomes.
Why is the prototyping process important?
The prototyping process is important because it replaces assumptions with real user feedback. It helps teams identify issues early and make better decisions. This leads to more effective and usable products.
What is the difference between low-fidelity and high-fidelity prototypes?
Low-fidelity prototypes are simple and quick to create, used for early-stage ideas. High-fidelity prototypes are more detailed and interactive, used for final validation. Each serves a different purpose in the process.
How many iterations should a prototype go through?
A prototype should go through as many iterations as needed to validate key assumptions. The focus is on learning, not a fixed number. Each iteration improves the product based on feedback.